Pages

Sunday, October 16, 2016

The best of two worlds, A pie baked in a cake!

Pecan pie inside a Butter Pecan Cake


Say whaaat? You can have the best of two worlds: Cake AND Pie all in one. I made this desert for Thanksgiving last week.

I got this idea from a CTV Edmonton Morning Live show last year when they showed a chocolate cake with a pumpkin pie inside. Since then, I have seen other similar posts on Pinterest on cakes with pie baked inside. 

Basically, you can make this pie/cake concoction in any flavours you want. Like chocolate and cherry? Why not a rich chocolate cake and a cherry pie inside, (yum)…or a spice cake and pumpkin pie inside. The variations are endless.

You can be a purest and make the pie and cake from scratch or do what I did and use a store bought pie and boxed cake mix.

Here rules on making this cake:
  • Make sure the pie that goes into the cake batter is cooked! Sorry, but this is just to be on the safe side for some people out there. Do not use a frozen/thawed/or raw pie. The cake will end up in burnt crisp if it's got to bake a pie inside it too.
  • This pie/cake will not work with lemon meringue pies (like lemon or flapper) or banana or coconut cream pies. Maybe, you can use the pie without the meringue or cream topping. Just use the curd and crust part. Like the pumpkin pie. I think the topping one those pies will make a horrible mess with the cake batter.
  • Believe it or not, when I tell people about this recipe, they ask how me how I would cut the pie in the cake through the foil. Remove the pie from it's baking plate.
  • Make sure you use a spring form pan that the pie would find inside with room around the crust for the batter to pour around. The more room the better for the cake batter to go around the pie. Plus, the spring form pan is the easiest to slice and serve this cake.
Here is my Thanksgiving pie I made with the 'Pie in the Cake' technique. I served my cake with a warm Butterscotch sauce.

Pecan pie in Butter Pecan Cake


The ingredients used to make the pie/cake. No shame - boxed cake mix and Safeway pie.
Ingredients for cake:
1 box of Butter Pecan Cake Mix (Betty Crocker) or your favorite cake recipe
1 cup of Milk
½ cup Vegetable Oil
3 large Eggs (room temperature)
1 ready made Pecan Pie or any other pie
Cooking spray
Pinch of flour

Tools:
Mixing bowl
Hand mixer
Rubber spatula or wooden spoon
Spring form pan
Parchment paper and scissors
Knife

Instructions:
Preheat oven to 350 degrees. 

On the spring form pan, spray on the bottom and lightly on the sides the cooking spray. Lightly flour the bottom of the pan only.

Get a pair of scissors and cut out the parchment paper strips to put around the sides of the Spring form. Try to cut them the width of the pan and you might need to put two parchment strips that overlap each other. Put aside.

*I find the parchment helps the releasing the cake easier around the sides.

Spring Form pan ready for the cake.

In a large mixing bowl, add the cake mix. Brake any large clumps of mix with a wooden spoon to help mix well. 

Add the milk, oil, and eggs. A trick I do is crack the eggs in a smaller bowl individually and add it to the mix. In case one of the eggs is bad, you did not ruin the entire cake mix.


Mix the batter by either using a mixer or hand mixer on low speed for 30 seconds to make sure the ingredients are mixed well. Then beat on medium speed for about 2 minutes and scrapping the bowl sides. Don’t over beat. Pretty much, follow the cake instructions on the box.

Mixing up the batter
Pour about 1/3 or so of the batter into the prepared pan. Not sure how much 1/3 is?Just try to cover the bottom of the pan and make sure the batter comes up a least ½ inch in height.

Removing the pie gently out of the plate (easier cutting)
Remove the pie from the foil pan gently. If it breaks up a little, don’t worry – put it back together on top of the batter. 

Place the pie on top of the batter – don’t press down. You don’t want the pie to sink to the bottom of the cake. My pecan pie was pretty dense and it down sink down a bit, but it still worked.

The pie on top of the batter.
Next, pour the rest of the batter on and around the pie. Make sure the pie is covered and the sides have batter. 

Do a small shake of the pan to get the batter into place. I take a knife and swirl it gently around the batter to get any air pockets.

Batter on top of the pie
Place in the hot oven and bake for 40 – 45 minutes or until inserting a knife in the center comes out clean. 

Due to the fact we’re using a spring form pan, I noticed the time the cake mix says didn’t work out. My cake actually took 50 minutes. Could be because the cake was denser using this type of pan and that there was a pie inside that took a while for the heat to get through. I kept checking my cake every five minutes after 40 minutes to see where I was at. Once the knife or the toothpick came out clean – it was good.
The finished cake

Let the cake cool off completely before removing the sides of the pan. It could take about two hours before it's safe to remove the spring form.

The finished masterpiece
Take the sides off from the cake and serve with your favourite topping sauce, whip cream, or ice cream (whatever you like). 

This cake tastes good on its own too. How can it not? It has a PIE inside! It’s own filling.

it was a hit at our Thanksgiving table
Maybe, next time - I'll add more batter to the bottom. Pecan pie is pretty heavy.

Butterscotch sauce (adapted from Smitten Kitchen)


Sorry, I don't have step by step pictures on how to make the sauce. It got busy at Thanksgiving and forgot to take pictures.. I got this recipe from Smitten Kitchen and it’s called Ridiculously Easy Butterscotch sauce. This is so good! The website had pictures if you want to see it.

My cake topped with warm Butterscotch sauce, pecans and vanilla ice cream. 
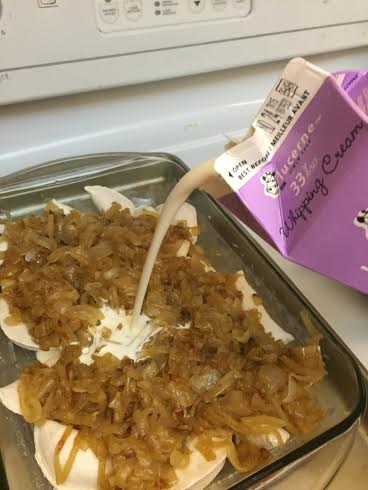
Ridiculously Easy Butterscotch Sauce (adapted from Smitten Kitchen)

¼ cup of unsalted Butter
½ cup of packed Brown sugar
½ cut of Heavy Cream (Whipping Cream)
½ teaspoon of flaky Sea Salt
1.5 teaspoons of pure Vanilla extract or more to taste

Melt butter in a medium heavy bottom saucepan over medium heat.
Add sugar, cream and salt and whisk until well blended.
Bring to a gentle boil and cook for about five minutes, whisking occasionally
Remove from heat and add one teaspoon of the vanilla extract, stirring to combine.

Carefully, take a clean spoon and dip into the sauce and taste the sauce without burning your tongue. I highly recommend blowing on it. Want more salt? Want more vanilla? Tweak to your taste buds. Or if it’s good, leave it alone.

Take off from heat and let it cool a bit to serve. You don’t want you or your guest to burn their tongue. The sauce will thicken as it cools. Give it 5-10 minutes before serving.

Pour over the cake or your favorite ice cream. So good!

The sauce can be stored in an airtight in the fridge and reheated in the microwave (if there is any left!)

Enjoy!

Thursday, November 12, 2015

Baked Perogies in Cream


Yes, me bad. It’s been a while since my last post. I do have lots to get down on my blog. Such as, I’ve been to a cookbook signing, I went to a few restaurants and my Thanksgiving meal menu (which hopefully, I’ll post for Christmas). I'll try and get myself into gear....


Today, I am sharing a really easy and affordable recipe. I got this yummy dish idea from my supervisor at work. It’s easy, it's decadent - but does take time (like all great things) but it’s worth it. 

Ingredients:

1 Bag of Frozen Perogies (your favorite brand, don’t defrost)
2-3 Onions, sliced 
and/or 2 cups of sliced Mushrooms
2 Tbsp. Oil (Sunflower, grape seed or corn, avoid olive oil)
1 Tbsp. of Butter
Salt and Pepper to taste
3/4 - 1 litre of Whipping Cream

Tools:

Fry pan, cutting board, knife, wooden spoon, lasagna pan, cookie sheet, serve spoon and foil.

Cook time: 1.5 - 2 hours and 30 minutes of prep time.

Serves: 4 Very hearty meals, or 6-8 side dish.

Preheat oven to 375. 

Lightly grease a shallow baking dish (like a lasagna pan) and place on top of a cookie sheet.

Slice the onions and/or the mushroom into somewhat thin slices. Heat the fry pan on medium heat, add the oil and sauté the onions/mushrooms until cooked or caramelized. I used onions, (had no mushrooms).


Just the right color...

I recommend to stir often, you don't want them to burn. I like my onions to turn somewhat a shade of light tan.  When you have your veggies cooked to your likeness, turn off the heat and put aside.

Empty the bag of frozen perogies into the baking dish, top with onions/mushrooms and spread it evenly.


Poor the whipping cream around the dish, making sure the perogies are covered. 

You might not need the whole carton. Just make sure the perogies are covered, since this is the liquid they are going to be cooked in. 

Shake a little salt and pepper on top to your liking.


Cover with foil and place into the oven. 

I keep the dish on top of a cook sheet in case there are any bubble overs. You won’t want to clean burnt cream on you oven.

Cook for 1.5 to 2 hours

See, there was a little boil over - good thing I had the cookie sheet

The cream will thicken and make the dish oh so decadent.

This is not a low calorie dish, but it’s the ultimate comfort food. Not sure how it would turn out if you use half n’ half, but I’m the kind of girl with an all or nothing thinking. I’ll have a salad tomorrow.


Until next time, 

Saturday, October 24, 2015

Saturday, August 29, 2015

Alberta Open Farm Days

Our visit to local farmers!


So so Sorry everyone….life has gotten the best of me. Every week I've been wanting to post, but summer has been busy - I hope there are still people out there reading my blog..hello?
It’s been a while and I’m back and I have a new post about my weekend adventure.

Today’s post is about Alberta Open Farm Days! An annual event that is held all over Alberta where us regular folk can visit various farms to see where our food comes from. What’s also great about this event – IT’S FREE! (Or very close to it) If you haven’t attended any of these open farms, I highly recommend you mark your calendar for next year. Usually, around the end of August on a Sunday.

For more information, go to the Alberta Open Farm Days at: www.albertafarmdays.com. Also, watch the video on the website – firstly, it's beautiful. Secondly, it makes you feel proud of the amazing people that grow our food here in Alberta.

Alberta Open Farm Days has a listing of the farms that are part of the event, and divides the province in three sections=North, Central and South. There is a brief explanation of the farm, who’s the farmers are and contact info and directions to the farm.

We of course did the north section and researched a day before where we wanted to go and planned our travel. There were 19 farms available to choose from in the north area. Plus, I heard one of the farms, the Cheesiry had a special meal made on the Saturday before. I recommend you check out the farms a few days before to see if they are doing any special events during Alberta Open Farm days.

I’m an advocate in buying local, supporting your community and eating real food. You get a sense of pride when you cook or prepare something you know where it came from and it’s reassuring to know what’s in your food.

The day we ventured out was beautiful. I couldn’t ask for better weather. Sunny and not too hot, with a little breeze. Driving to these farms on highway 21 was breathtaking. It’s always nice to go on an adventure once and awhile.

Irvings Farm Fresh...what a nice day! 

Our first farm was Irvings Farm Fresh Ltd., which produces free range heritage breed pigs and they have their own meat shop on the farm. They are just located east of the village of Roundhill. Depending on what area of Edmonton you are form, it can take little over an hour to get to. It really made me appreciate how the owners of Irvings drive to deliver their products at both the Strathcona and Downtown’s Farmers Market.

Alan Irving, the owner and farmer already knows my hubby and me from the farmers markets we frequent. It was nice to get a chance to see where our favourite bacon comes from.

When we got there, we parked in a grassy area by -the front gate. It was nice to see that there were quite a few cars parked there already and taking in this event. We were greeted by a lady close to the gate for both of us to sign in (just to keep track of how many people came) and she told us some information about where was what and what to see.

Lunch time! They enjoy the great outdoors.

Spa mud treatment to cool off

Alan was in the pen with the pigs and explaining to a group of us about the pig breed, what they eat, how they get along, where they sleep, and everything you need to know about their pigs. He answered questions and explained how the animals are moved to a processing plant, then returned to the farm to make sausages and other items.

The animals even came up to Alan for few times to get pets. It’s nice to see the conditions the animals lived in. Even though, they end up not with a happy ending – they did get to enjoy their life outside, with fresh air, warm bedding, good food and some sort of affection. Sadly, not all commercial pigs are raised this way. Also, it was nice to see the farmer showing pride in what he raises and respecting the animals.

Alan giving the pigs some loving strokes

He opened the water to makes some mud for them to roll around in, told us about the items they plant for the pigs to route around in. The animals looked very content and had a lot of room to run around in and they do get to go to new areas and rooted up greens. The barn was open for them to go in and out of anytime they wanted, and was a great shelter from the rain and cold. There was even heaters for the upcoming cold months. Alan mentioned that the pig’s tail can show how content they are, if it in a tight curl – you got a happy pig. There were plenty of curly tails.

We got to pet some horses they had there and their sweet farm dogs.

Horses!

Farm dog one

Farm Dog #2 - only 4 months old

They also had their meat shop open and had a small tour of what they make on the farm. At the meat shop they showed us how they made their various sausages, smoked their meats and make their awesome bacon. We ended up buying some bacon, sausage and pork belly to take home.

Tour of the meat shop

What was really nice about Irvings, was their generosity. We not expecting any lunch or food, but they served us a great lunch! Pulled pork on a bun with coleslaw and various sweet squares. It was delicious! Not all farms gave free food.

Pulled pork on a bun, salad and a coconut cake square - YUM!

We thanked Alan for opening the farm and sharing his livelihood to us, then we took off to the next farm – A.L.P.C.A.

A.L.P.C.A. (Sunnyhill Alpacas and Twisted Sisters Mill) is located in Rollyview, just forty five minutes west of Irvings. As the name state, the farm has Alpacas! We drove up their well-manicured driveway and parked on a batch of grass.

the market


My yarn.  now to find what to make...
They had a little market and tents were there were some craft making. We talked up to the information booth and a friendly gentleman told us about the farm, and explained where the Alpaca’s were, where the mill was and mentioned there was a soap making area for kids.


SO CUTE!  I want one!


Again, this was another self-guided walk about and we headed over to where the alpacas were. What can I tell you about alpacas? They are very, very cute! A cross between sheep and a giraffe. They are also very skittish, we never had a chance to pet one. These guys had the funniest haircuts. Found out they were sheared in May. Some had fluffy muffin topped heads, others had shaggy leggings.


Baby alpacas

We entered their mill, that the moment you walked in you got hit with a gust of heat and humidity. We learned that they had to keep the mill at 80% humidity and warn to get the yarn to the right consistency. The owner gave us a tour of the mill and their many machinery.
Sun drying

Machine removing debris

light as a cloud

spooling the yarn
He showed us where and how they wash the alpaca wool, how they dry (summer outside/winter hang to dry) then how it goes through a machine to remove the grass and debris from the hair, then they through various machine to stretch and roll them in a spool. I learned so much from the tour and being a novice knitter – I just had to buy some of their yarn.


We walked to the market and looked at the various wool items. I wished I brought more money, there were some amazing scarves for reasonable prices. There were two ladies showing how yarn was made using the old fashion spindles. Also, learned that there are two types of alpacas, a regular and a silky. The silky alpacas have longer and curlier hair. I thought the shaggy type of yarn was man made, but it’s natural from a breed type.


After this great tour of alpacas and yarn, off we went to our last farm of the day that was on our way back home to Edmonton.

Barr Estates Winery is located just outside Sherwood Park. The farm has sheep, some petting zoo animals and fruit wine! Arriving at the farm, we were greeted by a lady right at the gate, she told us the lay of the land and that there was wine sampling, and some food for sale there.

see the sheep in the background
The winery makes two wines right now, a raspberry and rhubarb. They were both really good, and had a hard time deciding. The owner told us they were working on a new flavour and is in the testing stages right now. 

The owner gave us a tour where they make the wine and answered our questions.

Wine making!


If you go to their website, you can find locations where they sell their wines, pretty much across Alberta.

Those are some BIG rhubarbs to make wine with

We enjoyed a lamb sausage sandwich ($4 only), with homemade ice cream and rhubarb compote ($2) – plus some wine sampling ($1). Very reasonable and very tasty.

Wine sample - "The Other Red" a raspberry wine
Fresh ice cream with rhubarb compote- YUM!
All in all, this adventure was lots of fun, learning and a great way to see what is available here in Alberta. I recommend that you put a reminder somewhere for next year. I know, we’re going.

Until next time, keep local!

Information:
Alberta Farm Days
When: mid/end of August, weekend
Location: various participating farms throughout Alberta
Phone: 1-800-Alberta (252-3782)

Irvings Farm Fresh
18469 Township Road 484, Round Hill
(780) 672-2787

A.L.P.A.C.A. (Sunnyhill Alpacas and Twisted Sisters Mill)
(780) 986-5392
49319B Rge Rd 234
Leduc Count


Barr Estate Winery
(780) 819-9463
Website: www.barr.ca


Sunday, May 17, 2015

Beer and a history adventure in YEG

BrewCurious Heritage Beer Tour 2015

 
So true my friend...
On April 18th, I went on the Edmonton City as Museum Project: BrewCurious Heritage Beer Tour. This event and project is an initiative of the Edmonton Historic council.

I am a massive history junkie (especially about my home town) and my second favorite vice is beer. Having history and beer rolled into a six hour tour – it was one of the best days of my life!

We all got on a city of Edmonton chartered bus and sampled beers, had a good breakfast and learned about the amazing brewing history.

It’s truly amazing how Edmonton was shaped by a brewing and distilling industry since the late 1800s. Just like oil - it’s a boom and bust cycle. Our local brewers throughout the ages fought not only changing economies, but also Alberta’s Prohibition (1916-1923), and commercialization of the industry and various changing legislation.

The tour focused on craft brewers, who not only made history - but built unique brands that were enjoyed in pubs and homes across our great province, even to this day.

Our chariot
Our tour started off at Brewsters in Oliver Square. We all hopped on our very own chartered ETS bus. The first brewery we hit was Yellowhead Premium Lager, on 105 Street, just off of 102 Avenue. There we had a delicious breakfast and a sample of their lager. After our fill up of food and beer, we had a tour of the brewery.

Yellowhead brewery in the Shaw Building

Yellowhead Premium Lager is named after the first commercially brewed beer in Edmonton. Yellowhead beer originated in 1894, and was made by the Edmonton Brewing and Malting Company (EB&M), located in the river valley. (More later on this post).

The main entrance
Egg muffins and other baked goodies
The original 1894 ‘Yellowhead’ and the current Yellowhead beer (and the highway too) take the name from an actual historical personality Pierre Bostanais, nicked named: Tête Jaune (Tête is head & Jaune is yellow in French). Tête Jaune was a fair haired Metis trader. If you want to learn more about him, click here.

The building in which Yellowhead is in used to be owned by H.V. Shaw. The building was built in 1914 (cost estimate then at $50,000) and was a cigar factory. The place manufactured over a million cigars, but in 1919 hard times hit with prohibition closing down saloons and the popularity of cigarettes – the Edmonton cigar factory closed its door. In 2007, a brewery by the name of Maverick came in. I did not get much information on them, but they were short lived and Yellowhead took over the building after Maverick left.


The brewery tour
I’ve been to Yellowhead’s tasting room before and attended a wedding reception there. The building is quite nice inside. Exposed brick, large wooden beams, hardwood floors and open space makes the place look rustic. Take a look for yourself here. Plus, their food is pretty tasty. I recommend them for any special events.

The next stop on our tour, was just outside the old Molson’s brew plant on 104 avenue and 121 street. Due to construction, we could not go inside.


Molson's old building - originally owned by Edmonton Brewing and Malting
The building in which the iconic outline of the Molson sign still adorns, was built in 1913 for Yellowhead’s Edmonton Brewing and Malting (EB&M). EB&M wanted to move away from the river valley due to the labour it took to deliver the beer uphill from the river, the occasional river floods and the new location was right by trains for transportation across the province.

The construction cost of the building was about $600,000 and was designed to look like a Gothic German Castle.

In 1922, EB&M was taken over by Fritz Sick. In 1944, Fritz Sick changed the name of EB&M to Sick’s Edmonton Brewing. In 1958, Montreal’s Molson purchased Sick’s Brewing and manufactured beer for the longest time in the location. In 2007, Molson moved out and the building has been empty ever since. The building was designated a historic site in 1980, and the “fort” that was outside the building was famous for hosting the Wayne Gretzky trade back in 1988.


A Picture shown on our tour of the Molson's building in 1949.
As some of you know, the building is being incorporated into the new commercial/shopping establishment called the Brewery District. This new establishment is currently under construction and will likely open later this year or early spring…(?)

After Molson’s, we hopped on the bus again and were on our way to Alley Kat brewery. At Alley Kat, we took a tour of the establishment. We also got a chance to buy off sales – Yeah!


Let the fun begin

Alley Kat Brewery opened its doors in 1995 and remains to be Edmonton’s longest running micro-brewing company (Alberta’s fourth longest micro brew).


Inside Alley Kat's Brewery
Getting samples of beer to the public
Our friends at Alley Kat and Beer Geeks Anonymous founder Jason Foster, brewed a special heritage beer named the GIRDER BENDER. I think the name came about from the 102 street bridge fiasco. This was the only opportunity to sample the beer. 


The Girder Bender - very good beer.
I am not a dark beer/stout fan – but I really did liked the beer. It was smooth, hints of caramel and went down very easily. I won third prize in describing the beer’s taste. I am an owner of a new growler bottle from Cask and Barrel. That made my growler collection now to about six.


Neil Herbst co-owner of Alley Kat and me

One of my purchases
After getting a bit of a buzz on the various beer sampling at Alley Kat, our next stop was off the beaten path. We headed to the City Artifact Centre that is on Fort Hill road, located off the Walter Dale hill, just east of the Kinsmen sport centre. I didn’t even know this building existed until that day. What is interesting about that building was that it was built to be a new brewery that never opened.

Up the hill from this building, used to stand the original Strathcona Brewing &Malting’s brick building that was facing Saskatchewan Drive. The brewery went out of business when prohibition came into effect.


The hill where the Brewery used to be
After prohibition, the Northwest Brewing Company’s (O’Keefe’s Brewery was the parent company) purchased the building in 1924. In 1958 the NW Brewing Company changed their name to their flagship beer: Bohemian Maid.

The beer was manufactured well into the 1970’s. Which in the same decade the company built another newer building just down the hill. In the late 1970’s, Bohemian Maid packed up and the original brick building that Strathcona Brewing started was torn down, while the newer building still stands and houses artifacts.

Outside the Edmonton Artifact building we were shown a now covered sink hole that appeared in 2013. When the city tried to fill the hole, the crews noticed there was an underground stream that was most likely used in the manufacturing of the beer, and lots of stubby beer bottles at the bottom of the hole.

We were so lucky to have the opportunity to into the Artifacts building. This place is not open to the public and as a historic nut – I was in heaven.


In the artifact building. Some of the beer items collected.
The building is very large and had two floors filled with lots historic artifacts from Edmontonians. I was most impressed by the chair that Emily Murphy used in the Legislature. There were old HBC coats, chairs, pictures and of course old beer memorabilia. This place was a candy store of all things antique and I could’ve stayed for hours.


Historic!
Emily Murphy's chair
HBC coats 

We were told the artifacts are restored and are used in Fort Edmonton Park and John Walter’s Museum. Individuals have either donate items or the city purchase items from various estate sales. Trust me, this place was just amazing. The tour’s fee was worth every penny when I saw the inside of the building.


Furniture from old department stores from Jasper Avenue.

The next stop of the day, took us to the other side of the river in the Rossdale community. There, in its glory - we were outside the building that started Edmonton’s first beer: Yellowhead. The building was established in 1905 by Edmonton Brewing & Malting and is a historic designation. When the demand of beer increased, and the issue of bring the barrels up the hills got too tiresome - EB&M moved into the building that housed Molson. The EB&M Rossdale building is now home to private citizens.


The building where it all began
An interesting tid-bit, the original EB&M “Yellowhead” Rossdale building is currently owned by GeneDub, who is no other the owner of the ‘now’ Yellowhead Premium Lager. Wow, a full circle in Edmonton’s beer history!


A picture of the original brewery behind the baseball diamond
The final stop of the tour was our original start: Brewsters in Oliver Square. At Brewsters’, we had a tour of their manufacturing and storage facilities. The beer is made on the first level and then pumped and stored in a very cold room, on the second level. The bar has pipes that link to the second floor. You can’t get any fresher beer than that.


At Brewsters, we got our swag bag, which consisted of two glasses. An Alleykat glass and a special and limited edition of the Girder Bender. We also got a ticket to the Craft Beer Festival on June 6th and a Sherbrooke bottle opener. I found the goodies pretty sweet.


Our swag bag
Also, our tour included a free pint of beer at Brewsters. I had the Hammer Head red ale and when my hubby picked me up, he ordered himself a black and tan. Ah, what a great way to end a day of beer history.


Hammer Head Red Ale

Black and tan
I truly enjoyed this tour with Edmonton City as Museum Project and I hope they continue with more. Our tour guide mentioned that they are thinking of doing another beer tour in October. - Sign me up!


Some old beer labels made here in Edmonton
Beer 101: Lagers are a German style of beer. You will hear a lot about lagers and ales, and the difference is lagers are fermented and conditioned at low temperatures, while Ales are brewed using warm fermentation. The new buzz is India Pale Ale or commonly known as IPA’s – it’s a type of beer originated in Great Britain, which used a high quantity of hops to keep the beer from spoiling on voyages to India. Hops gives beer the tangy, grapefruit like taste.